Experimenting with Server-Driven UIs
An experiment in server-driven UI for mobile: a Rails API describes the screens, components and actions, and a React Native app renders them.
Contents
In recent years, the concept of server rendered HTML has gained significant traction in the web development world, we have tools like LiveWire, HotWire, Phoenix LiveView, HTMX, etc. It’s safe to say that having the backend be responsible for the logic comes with some cool advantages.
For a couple of years, as an industry, we developed tools and procedures that made it easier to push logic, domain knowledge, and complexity to the clients. Instead of having clients concern themselves with presentation, we gave them a way to query the database, with just a few extra steps.
Now, it looks like we’ve come full circle, back to a more
modern $('#component-id').html(response).
What About Mobile?#
The mobile medium, being relatively younger than the web, hasn’t fully embraced server-driven paradigms yet. Could the same principles apply to that world? We hear a lot about separating concerns, the request barrier looks like a good place to draw a separation line, and the thought of a single API that can be consumed from all kinds of clients helped with that.
In my day-to-day job, we try to balance between local and server-driven defined behaviors, but for months, I’ve had a thought in the back of my head: “how far can this server-driven UI concept go?” Could we get the same experience developing with HotWire in native app development? During the Christmas break, I had some time to experiment.
Introducing Tapiful#
Tapiful is a mobile app that allows users to write to NFC tags and manage those tags through an admin panel. It seemed like a good candidate to experiment with because it requires native mobile functionality.
The Fun Part#
Picking the Tech#
This blog post is more of mental experimentation than a technical one, however we got to pick our tools. For the server side of things, since I currently work with Rails, it made sense to build the API with that as for the mobile app, I chose React Native. I have some experience with it, and it seemed like a good choice for quick prototyping.
The lib#
Since everything has the word wire in it, let’s call our library NativeWire. It’s a small collection of bare-bones components defined in both our native app and API that respect the same contract and interactions.
Design#
Since we are following a server-driven UI approach, design seems like a good place to start.
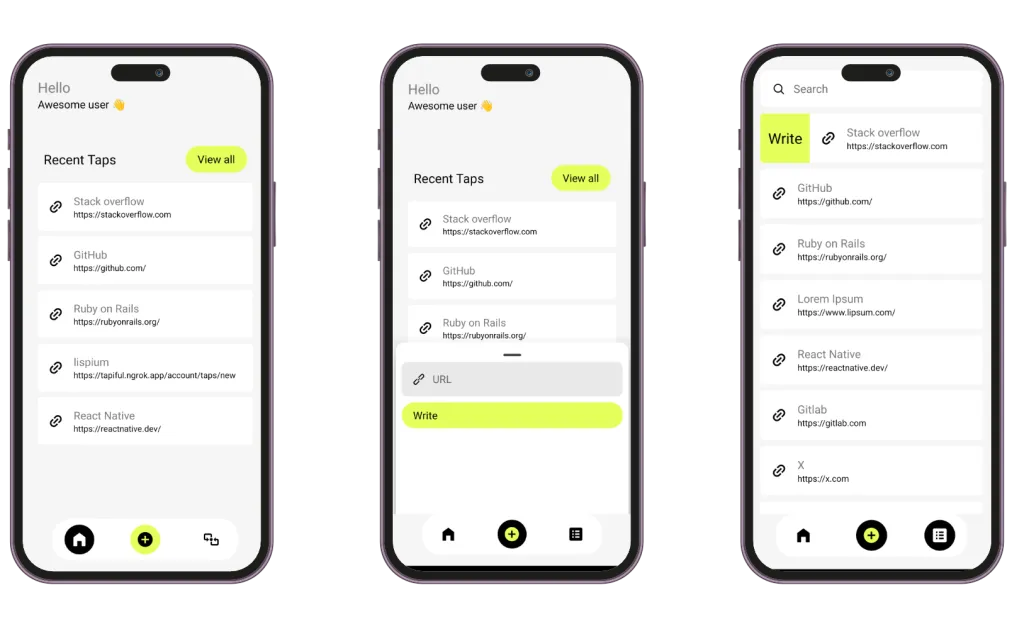
Modeling Our API the Server-Driven Way#
Screen Title Component#
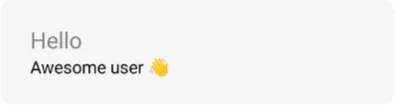
The screen title component consists of two texts with different colors and font sizes. We can call our text objects WiredText with the following attributes:type, text & style
The style Attribute
Our title component has all the styling defined locally. However, the style attribute works as a way to overwrite or define the stylesheet from the server. Since we’re working with React Native, it can contain the snake_case representation of stylesheet options, that are later transformed and merged with the local style.
📝 JSON sample
{
    "id": "screen-title",
    "title": {
        "id": 1055186697223747675,
        "type": "text",
        "text": "Hello",
        "style": {}
    },
    "subtitle": {
        "id": -3075408202456109205,
        "type": "text",
        "text": "Awesome user 👋",
        "style": {}
    },
    "type": "title"
}
Section Title Component#

This component looks like it consists of a WiredText object that we previously defined. However, it also has a button, which we will call WiredButton with the following attributes: id, type, title (a WiredText), link, style
📝 JSON sample
{
    "id": 5101,
    "title": {
        "id": 158,
        "type": "text",
        "text": "Recent Taps",
        "style": {}
    },
    "subtitle": {
        "id": "button-75",
        "type": "button",
        "title": {
            "id": 5518,
            "type": "text",
            "text": "View all",
            "style": {}
        },
        "link": "",
        "style": {}
    },
    "type": "section_title"
}
Card Component#
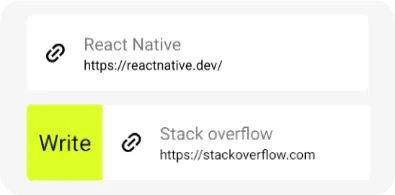
For our card component, we have the following attributes:
title (a WiredText object), subtitle (a WiredText object), icon_left_url, swipe_left (a WiredButton object, defining if the card is swappable) & style
📝 JSON sample
{
    "id": "card-7834",
    "type": "card",
    "title": {
        "id": 6426,
        "type": "text",
        "text": "Stack Overflow",
        "style": {}
    },
    "subtitle": {
        "id": 4804,
        "type": "text",
        "text": "https://stackoverflow.com",
        "style": {}
    },
    "icon_left_url": "https://www.svgrepo.com/show/535483/link.svg",
    "swipe_left": {
        "id": "button-85",
        "type": "button",
        "title": {
            "id": 8070,
            "type": "text",
            "text": "Write",
            "style": {}
        },
        "link": "",
        "style": {}
    }
}Navigation#
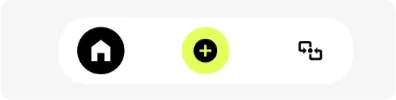
The navigation component will use an array of WiredButton objects. Here, the style attribute indicates the selected item.
📝 JSON sample
{
    "bottom_navigation": {
        "items": [
            {
                "id": "home",
                "type": "button",
                "link": "",
                "style": {
                    "color": "white",
                    "background_color": "black"
                },
                "icon_left_url": ""
            },
            {
                "id": "create_tap",
                "type": "button",
                "link": "",
                "style": {
                    "color": "#E4FF5A",
                    "background_color": "black"
                },
                "icon_left_url": ""
            },
            {
                "id": "taps",
                "type": "button",
                "link": "",
                "style": {
                    "color": "black",
                    "background_color": "transparent"
                },
                "icon_left_url": ""
            }
        ]
    }
}
Modeling user interactions#
We want the use interactions to be dynamic and defined by the API. For that we are going to use mobile URIs to transfer that information, you can think of them as the equivalent to web URLs.
Navigating between screens#
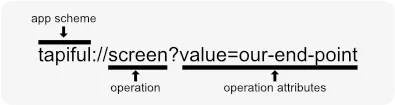
In our case, instead of using the link to point into a specific screen, we can pass the endpoint that the app needs to call to display the screen like so tapiful://screen?value=our-end-point that is later gets translated to that operation strategy.
Javascript sample
export default class OpenScreen {
  constructor(uri) {
    this.uri = uri;
  }

  execute() {
    navigate('Screen', {
      url: this.uri,
    });
  }
}
Input component#
Now we have a way to instruct our application to perform operations defined from the server we can create our input component. We will follow the same pattern as the other components but here we want to make an API call and render the results by updating our state, so, we will create a new link that does that. We that to fire that operation every time we update our input
Javascript sample
export default class UpdateCurrentScreen {
  constructor(uri) {
    this.uri = uri;
  }

  execute({text, screen}) {
    let endpoint = new URL(this.uri);
    endpoint.searchParams.append('text', text);

    // ...
    // Make the request and update the current screen
  }
}
🎥 Video of server driven search
{
    "id": "search-input",
    "type": "input",
    "placeholder": "Search",
    "icon_url": "https://www.svgrepo.com/show/532555/search.svg",
    "style": {},
    "value": "",
    "on_change_link": "tapiful://update?type=screen&value=end-point"
}
Dynamic screens#
For navigating between screens I used the React Navigation library.
One “limitation” is that our navigation requires at least one route to be defined before rendering any screens. However the information for the bottom tabs component is coming inside the screen’s response.
One way would be to create a splash screen and move the fetching of the navigation items under a bootstrap call. To much effort for an experiment 😅
So I opted out to have the home screen in the initial state of bottom navigation that is later get’s updated with the rest navigation items are fetched
// Redux initial state
const initialState = {
  bottom_navigation: {
    items: [
      {
        id: "home",
        initialParams: {
          url: "",
          link: "",
          id: "home",
        },
      },
    ],
  },
};
Defining the endpoints#
Well that was the easy part, through the links we instruct our app what endpoints to hit so something like api/screens/:our_sreen will do the job for now.
Rendering and updating the UI#
Ok so now we are at the point where we can instruct our app to make a request through a link it’s time to do something with the response.
If we want the UI changes to be driven by our API the state looks like the place we should go through.
The code flow is the following:
- Our
Screencomponent is initialized with an endpoint - It performs a GET request
- The response later is transformed and stored in Redux
- That later goes through a
Buildercomponent that is responsible for constructing the components.
🎥 Video of server diven navigation
Writing to the NFC tag#
It’s time to do what the app is supposed to do, write URLs to NFC tags.
There are two ways for the user to write a URL
- By swiping the card and pressing the Write button for URLs coming from the API
- By taping the plus icon and adding the URL by hand
We will explore the 2nd for now, as it’s more complex and interesting.
The bottom sheet component#
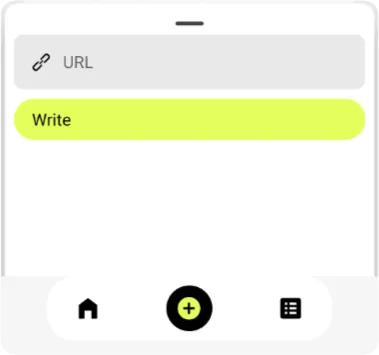
If you recall we want all the UI changes to go through our store, so in order for our app to open a bottom sheet we want to control it through the store. We already have an link that makes a call and updates our current screen this time we will instruct it to call the components/create_tap endpoint.
That will respond with the screen components including the bottom sheet component that itself contains an array of components similar to our screen, we also use the same Builder to construct the contents of the bottom sheet.
📝 JSON sample
{
    "components": [
        // ...other screen components
        {
            "id": "create-tap-bottom-sheet",
            "type": "bottom_sheet",
            "components": [
                {
                    "id": "url-input",
                    "version": "",
                    "value": "",
                    "type": "input",
                    "placeholder": "URL",
                    "icon_url": "https://www.svgrepo.com/show/522220/permalink.svg",
                    "style": {},
                    "on_change_link": ""
                },
                {
                    "id": "btn-id",
                    "type": "button",
                    "title": {
                        "id": 7720,
                        "type": "text",
                        "text": "Write",
                        "style": {}
                    },
                    "link": "",
                    "style": {}
                }
            ]
        }
    ]
}
Time to write#
The flow of writing to NFC tag goes something like this
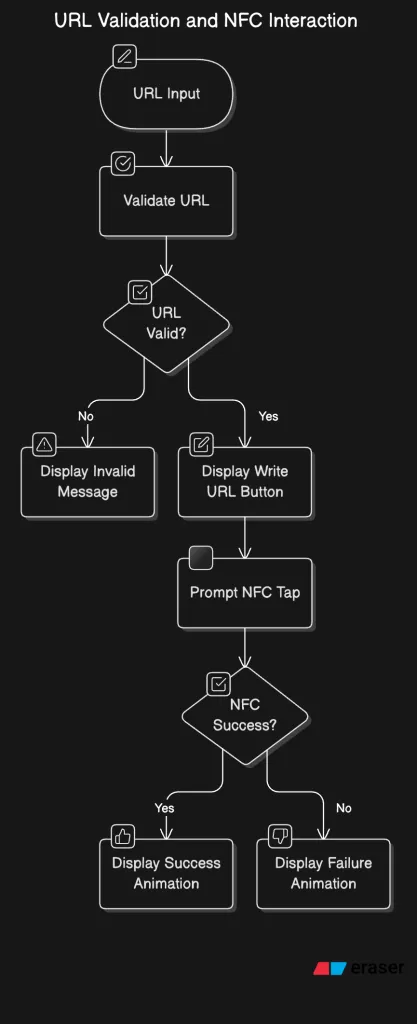
What we want is to
- Validate the URL while the user types it
- Display a message for an invalid url
- Display a button to write the URL
- Display animation to prompt the user to tap the NFC tag
- On success display success animation
- On failure display failure animation
- Display animation to prompt the user to tap the NFC tag
Let’s turn the above into code.
Send user input to the server
We will use the on_change_link attribute we used for the search input to send the user’s input to the server and update our screen, GET components/create_tap?text=https://goo...
Then depending on the value we will return a WiredText component to show the validation result.
Once the user enters a valid URL we will return a WiredButton with a link tapiful://screen?value=components/create_tap?text=user-input&url=url-to-write . This way our API knows to return the lottie animation.
Now it’s time to do the actual writing.
After we render the updated bottom sheet with the animation we also want to start writing, we can achieve that by introducing an After-Render-Link header that holds our write to NFC link along with a callback_link tapiful://write_nfc?callback_link=tapiful://update?type=screen&value=/api/components/create_tap?url=https%3A%2F%[2Fgoogle.com](http://2fgoogle.com/)&type=url&value=https://google.com
🎥 Video of successful NFC write
Closing Thoughts#
Server-driven UIs are an exciting concept, but they come with challenges:
Responsiveness: Every interaction depends on the server, which can introduce latency. Caching strategies might help mitigate this.
Payload Size: Defining everything in the API can make responses bulky, especially for repetitive UI elements. Using references to reduce redundancy could help.
My experiment with Tapiful was insightful, but the question remains: How far can we take server-driven UIs in native app development? 🤔